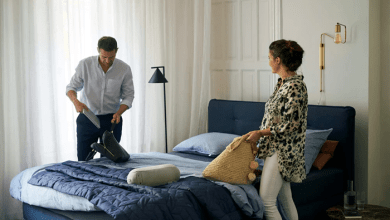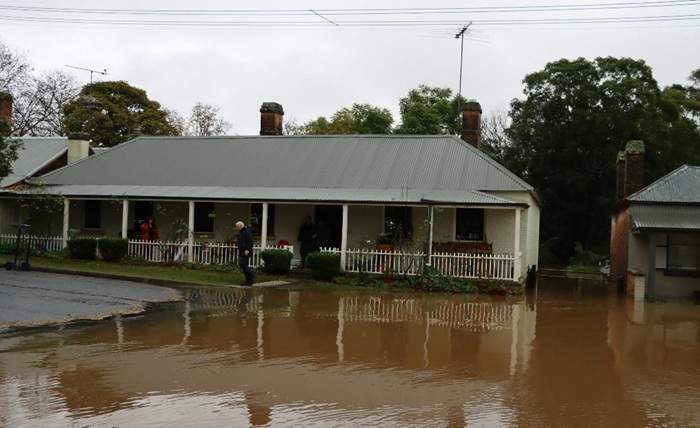
Water damage has a way of catching homeowners completely off guard. One moment, everything is fine, and the next, you are staring at a soaked ceiling, a flooded basement, or walls that have quietly been absorbing moisture for weeks.
For residents in Minnetonka, MN, dealing with this kind of situation requires quick thinking, a calm approach, and the right support to get your home back to normal. Knowing what to do in those first critical moments can make a significant difference in how much damage you ultimately have to deal with.
Finding the Right Help When Water Damage Strikes
Not every homeowner knows where to turn when water damage appears. It can feel overwhelming, especially when you are not sure how serious the problem is or what steps to take first.
The good news is that when it comes to water damage repair Minnetonka MN has plenty of professionals ready to help, which means you do not have to navigate the situation alone. Before reaching out to anyone, though, there are some immediate steps you should take to protect your home and reduce the extent of the damage.
Stop the Source First
The very first thing you need to do is cut off the water source causing the damage. If a pipe has burst, find your main water shutoff valve and turn it off immediately. If the damage is coming from an appliance, disconnect it from its water supply line. In cases where the source is external, such as heavy rain seeping in through a roof or window, do what you can to block the entry point using towels, tarps, or whatever is available.
Every minute that water continues flowing into your home adds to the overall damage. It also helps to know the location of your shutoff valve in advance, so you are not scrambling to find it during a stressful situation. Consider labeling it clearly and making sure every adult in your household knows exactly where it is.
Document Everything Before You Clean Up
Once the water source is under control, resist the urge to start cleaning up right away. Take your phone out and photograph or video everything you can see. Capture the affected walls, flooring, furniture, personal belongings, and any visible structural damage. This documentation is essential when you file a claim with your insurance provider.
Having a thorough visual record protects you from disputes and ensures you have solid evidence of the original condition of the damage. If possible, note the date and time on your recordings and write down a brief description of how and when you first discovered the damage.
Prioritize Safety Throughout the Process
Standing water is not just an inconvenience. It can be a genuine safety risk. If water has reached your electrical outlets, breaker panel, or any wiring, do not step into the affected area until the power has been turned off at the main breaker. Floodwater and sewage backups can also carry bacteria and contaminants that pose serious health risks.
Use rubber boots and gloves when moving through affected areas, and keep children and pets away from the space entirely until it has been properly assessed and cleaned. Be cautious of weakened flooring as well, since prolonged water exposure can compromise the integrity of wood and certain types of subflooring underfoot.
Start Removing Water as Soon as It Is Safe
Once you have confirmed it is safe to enter the area, begin removing standing water. Mops, towels, and wet vacuums can all help in this effort. The faster you extract the water, the less time it has to seep into your floors, walls, and subfloor.
If the affected area is large, renting a water extraction unit can speed up the process considerably. The goal is to get the area as dry as possible before mold has any opportunity to take hold. Pay particular attention to corners, closets, and spaces beneath furniture, as water tends to collect in areas that are easy to overlook.
Ventilate and Dry the Affected Area
After removing standing water, the drying process begins. Open windows and doors to allow fresh air to circulate. Use fans to push air across wet surfaces and position them to create a cross breeze if possible. Dehumidifiers are extremely useful at this stage because they pull moisture from the air and help prevent it from settling back into walls or flooring.
If carpets are soaked, pull them up along with the padding underneath, as these materials retain moisture and become breeding grounds for mold if left in place. Hard flooring such as tile or vinyl may appear dry on the surface while moisture continues to sit trapped beneath it, so do not assume the job is done based on appearance alone.
Watch for Mold in the Days That Follow
Mold can begin to develop within a day or two of water exposure, especially in warm and poorly ventilated spaces. Keep a close eye on walls, ceilings, and any porous surfaces in the days following the incident. Discoloration, a musty smell, or visible spots are all signs that mold may be growing.
At this point, professional remediation is strongly recommended rather than attempting to handle it yourself, as mold spreads quickly and can be hazardous to your health if disturbed without proper protective equipment. It is also worth checking inside cabinets, behind baseboards, and within wall cavities if they were exposed to moisture, since mold often establishes itself in hidden spaces before it becomes visible on the surface.
Assess the Structural Damage Carefully
Once the area has dried out, look carefully at the structural condition of the affected space. Check whether drywall has become soft or warped, whether wooden floors have buckled, and whether any beams or supports appear compromised.
Water has a tendency to weaken materials gradually, and damage that looks minor on the surface can sometimes run deeper than expected. A professional inspection at this stage gives you an accurate picture of what needs to be repaired or replaced before you invest in cosmetic restoration.